Create an enhanced VPN tunnel
Prerequisites
- Make sure your Alemca agent is at version 3.1.0 or higher.
- Make sure you have downloaded and installed
WireGuardfrom its official website, appropriate for your operating system. - Administrator rights: WireGuard requires administrator rights to install its network driver and create tunnel interfaces. Make sure you have the necessary permissions on your workstation.
- Local firewall: allow outbound UDP traffic to the endpoint port shown in the connection details (visible in the interface once your user is configured). On Windows, a rule may be required in Windows Defender Firewall.
- Corporate firewall / proxy: verify that your network infrastructure does not filter UDP traffic. A corporate firewall or transparent proxy blocking UDP will prevent the WireGuard tunnel from being established.
Steps
1. Create an Access Point
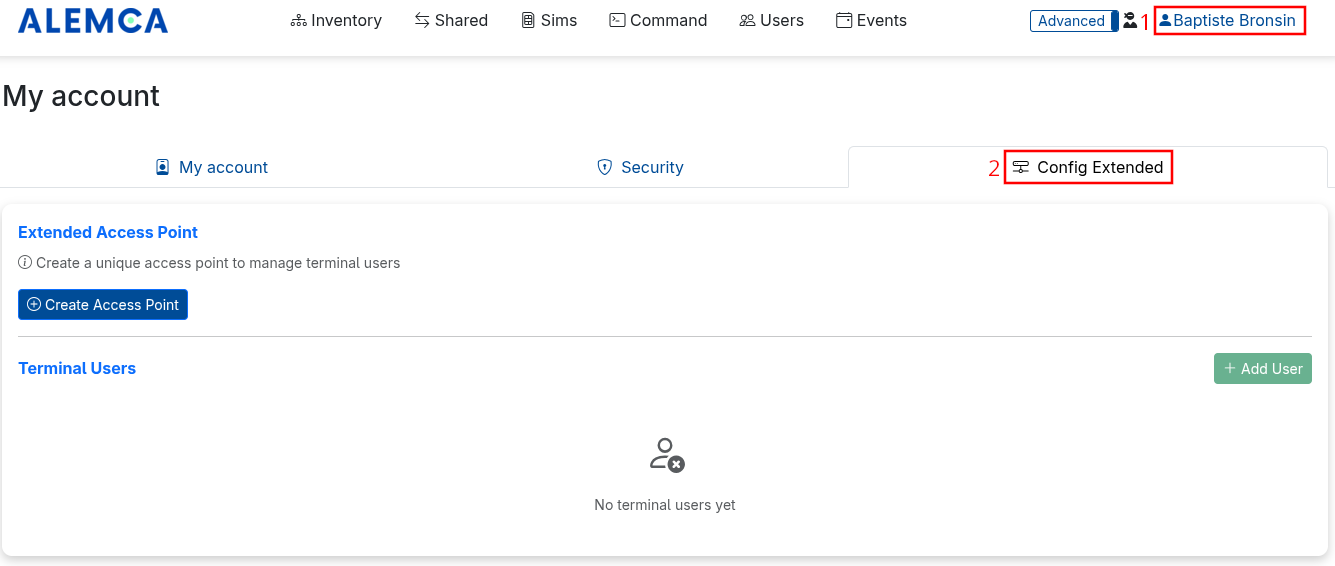
- Log in to the Alemca web interface.
- Go to My Account > Config Extended.
 3. Click Create Access Point, give it a name, then confirm.
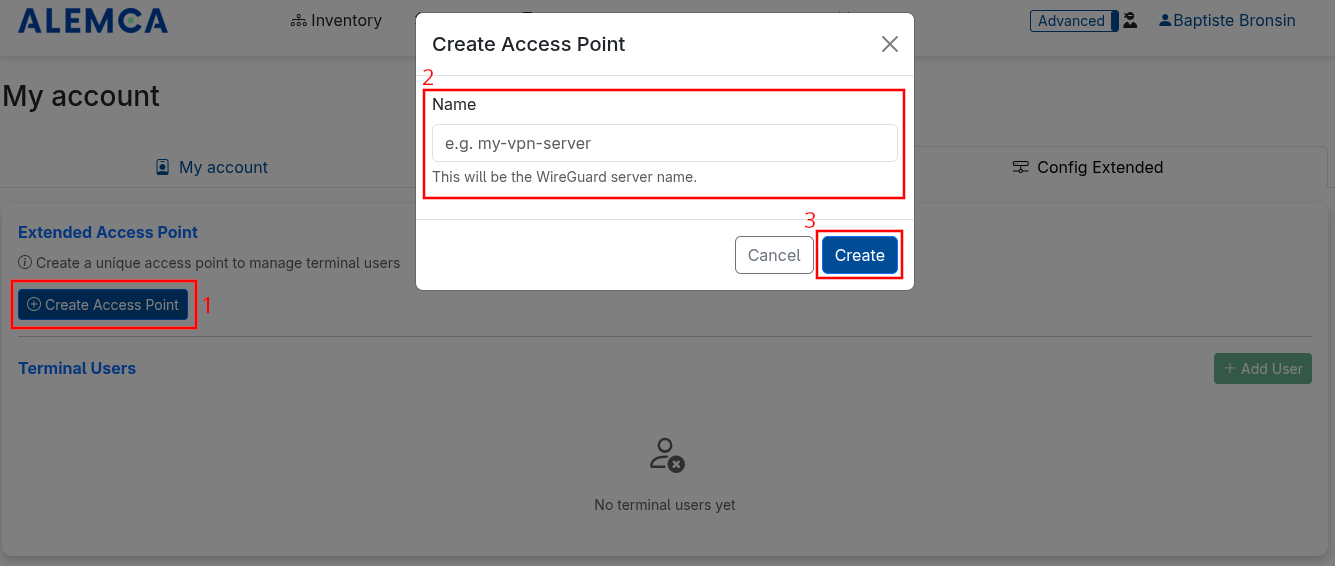 4. After a few seconds, your access point is ready and the message "Access point active" appears.
2. Generate a WireGuard Key Pair
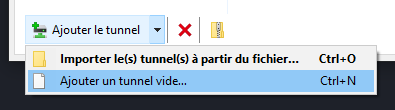
- Open the WireGuard application.
- Click Add Tunnel in the bottom left, then choose Add Empty Tunnel.
- WireGuard automatically generates a key pair. Copy the public key displayed at the top of the form — you will need it in the next step.
- Give the tunnel a name, then save it.
3. Add a User to the Access Point
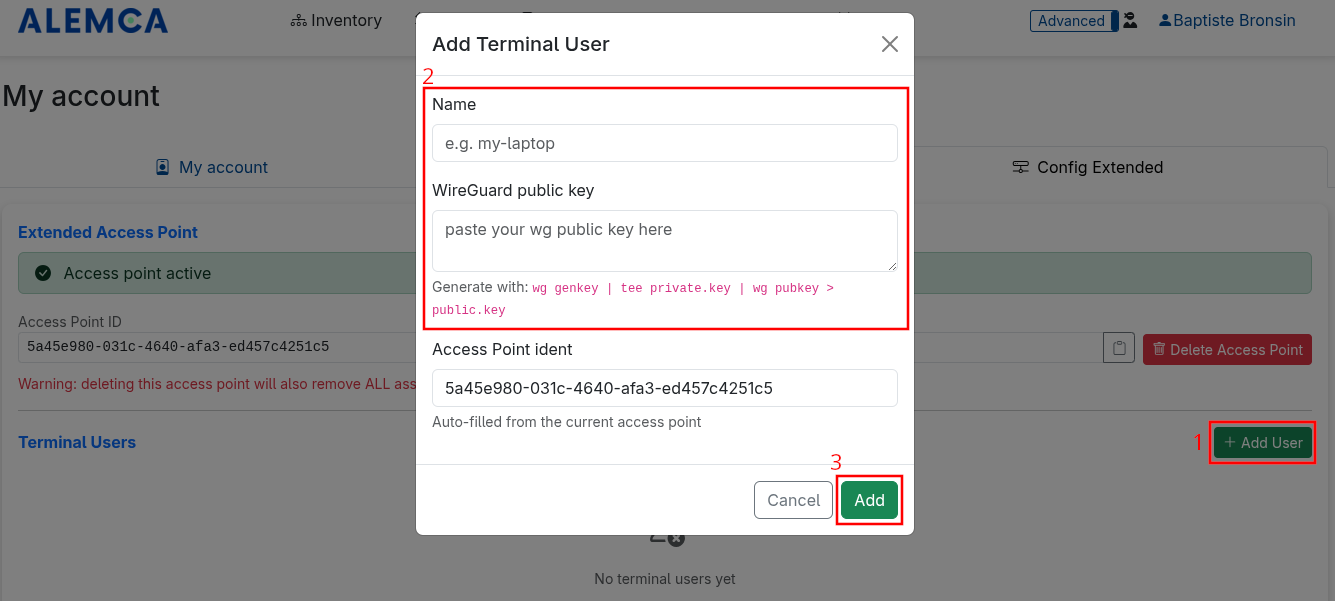
- Still on the Config Extended page, click Add User.
- Enter a username and paste the public key copied from WireGuard.
- Confirm the addition.
Propagation can take up to 1 minute. Once active, the connection details (assigned IP address, access point public key, etc.) appear in the interface.
4. Configure the WireGuard Client
Retrieve the information displayed in the user connection details. In the WireGuard application, open the tunnel created in the previous step and fill in the following configuration:
[Interface]
PrivateKey = <Private key automatically generated by WireGuard>
Address    = <Assigned IP address>

[Peer]
PublicKey  = <Access point public key>
Endpoint   = <Access point IP address>:<Port>
AllowedIPs = <Allowed address range>
Replace each value between < > with the one provided in the interface (the PrivateKey is already pre-filled by WireGuard).
Save and activate the tunnel by clicking Activate.
Windows 24H2 and later
Since the Windows 24H2 update, the WireGuard client may require one of the following solutions:
- Enable Windows virtualization: see the official Microsoft documentation.
-
Adjust the configuration: remove the
192.0.2.254/32address from theAllowedIPslist in the[Peer]section:
To verify the tunnel is active, check that the "latest handshake" field shows a recent timestamp (less than 2 minutes ago) in the WireGuard interface, confirming that the connection is established.
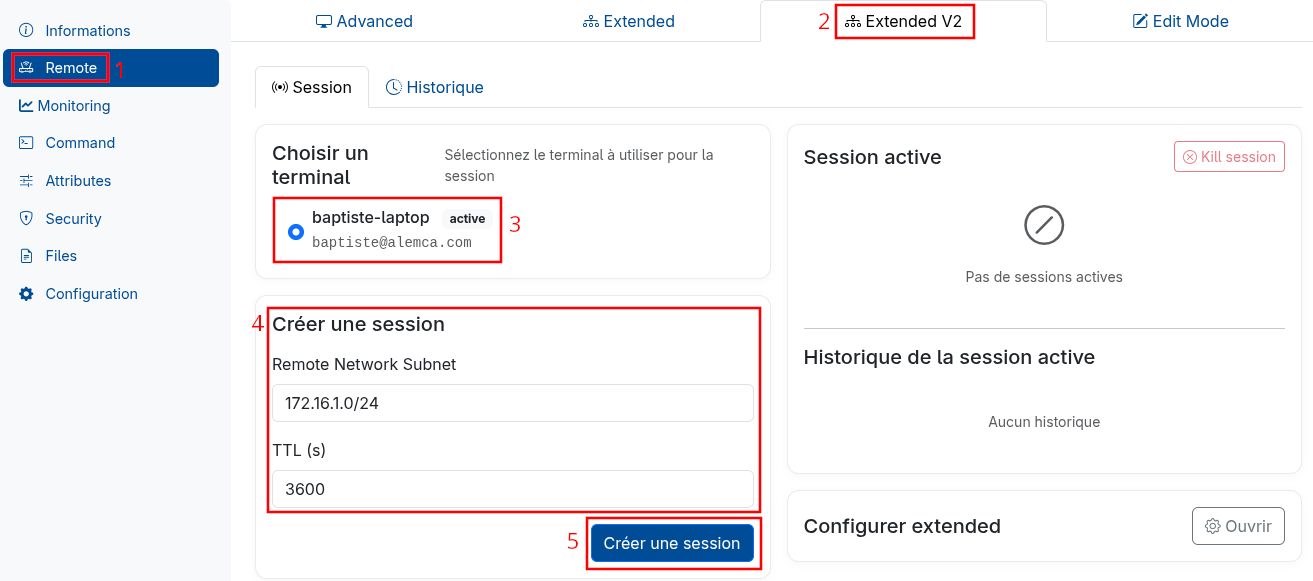
5. Create a Session with an Alemca Agent
- From the agent information page, open the Remote > Extended V2 section.
- In the Choose a terminal list, select the user created in the previous step.
- Fill in:
- Target subnet — the address range you want to access on the agent (e.g.
192.168.0.0/16) - Session duration — in seconds (e.g.
3600for 1 hour)
- Target subnet — the address range you want to access on the agent (e.g.
- Click Create session.
Warning
- To access the entire remote site network, you must enter the network address. Using only a single machine address (e.g.
192.168.1.10/32) will only give access to that device. - You can calculate the network address using the following tool.
- Select the desired subnet (e.g.
/24), enter the target IP (e.g.192.168.1.10), then click Calculate. - This will give you:
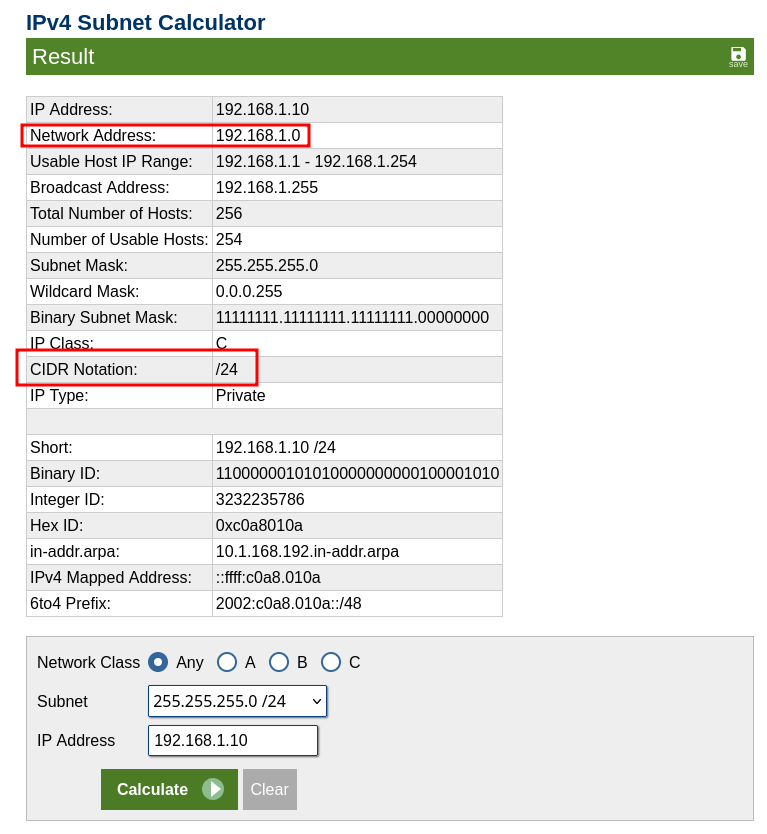
- All that remains is to fill in the field with the calculated network address, in our example
192.168.1.0/24.
The agent then establishes a WireGuard tunnel. Once the session is active, you can interact with the agent through this tunnel.
Remote Extended sessions are ephemeral and will be automatically deleted by the server.