Create a Wireguard tunnel
Prerequisites
Before you begin, make sure you have downloaded and installed WireGuard from its official website, suitable for your operating system.
Steps
-
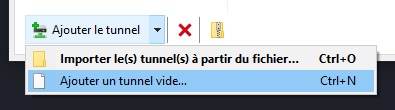
When we open WireGuard, we select “Add tunnel” at the bottom left, then choose “Add empty tunnel”.
-
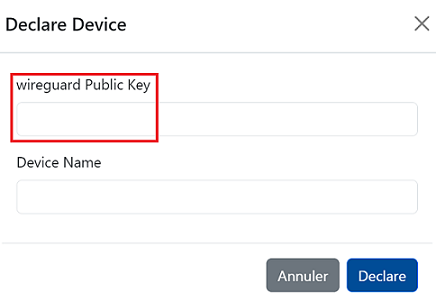
We copy the
public keyprovided to us and give our tunnel aname. -
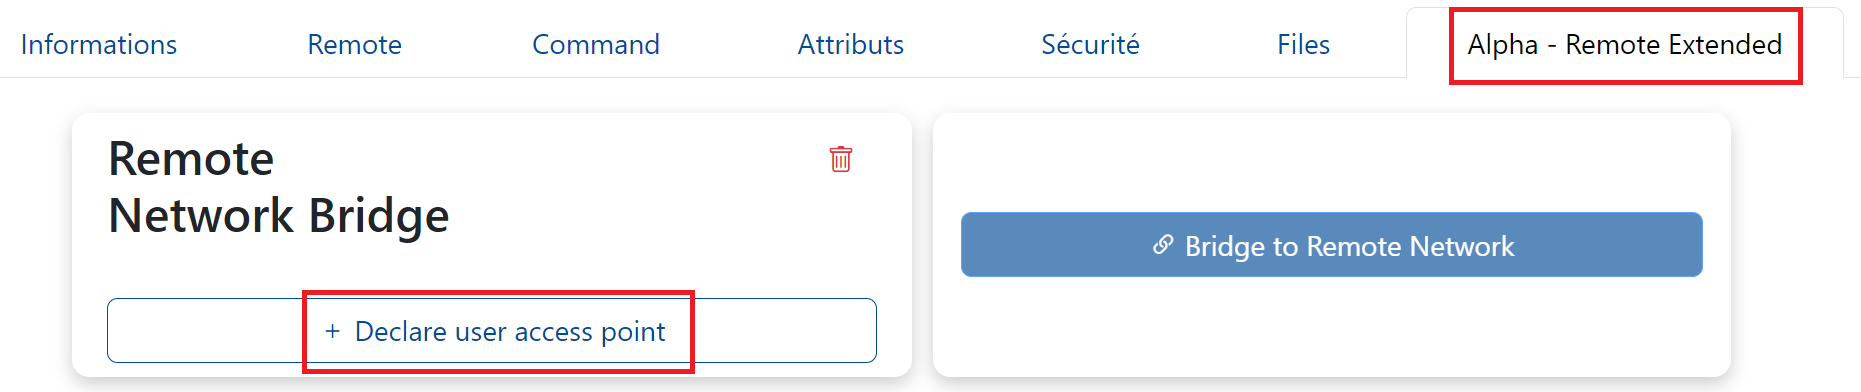
In the Alemca application, we access the page for the device we want to connect to remotely. Here, we click on Alpha Remote Extended.
-
By clicking on “Declare user access point”, we paste the copied public key (from Wireguard Tunnel) into the corresponding field in the modal that appears.
-
After that, we copy the
configurationsprovided by the application and paste them into the appropriate fields in WireGuard, as shown below. Once this is done, we save (by clicking on “Save”) and activate our tunnel.
Warning
Since the Windows 24H2 update, the WireGuard client requires a different configuration to function or to enable a Windows feature:
- For the Windows feature, here is the official documentation
-
For the configuration file, change “AllowedIPs = 192.0.2.254/32, 10.0.0.0/8, 172.16.0.0/12, 192.168.0.0/16” in Peer to:
- In the “Bridge to remote network” section, enter the IP address of the device connected to the network, for example:
192.168.1.10/32.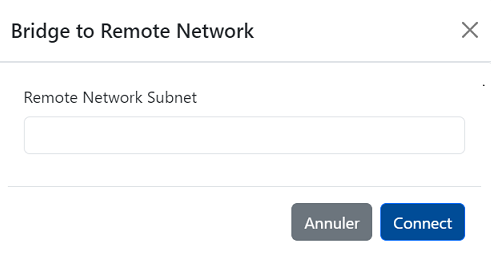
Warning
- If you want to have access to all the networks on the remote site, you will need to enter its network address, otherwise it will not work despite the confirmation message. (Otherwise, use the machine address, for example
192.168.1.10/32) - You can calculate this using the following site
- Select the desired subnet, for example
/24, then enter the IP address you want to use, for example192.168.1.10, then pressCalculate.- This will give you:
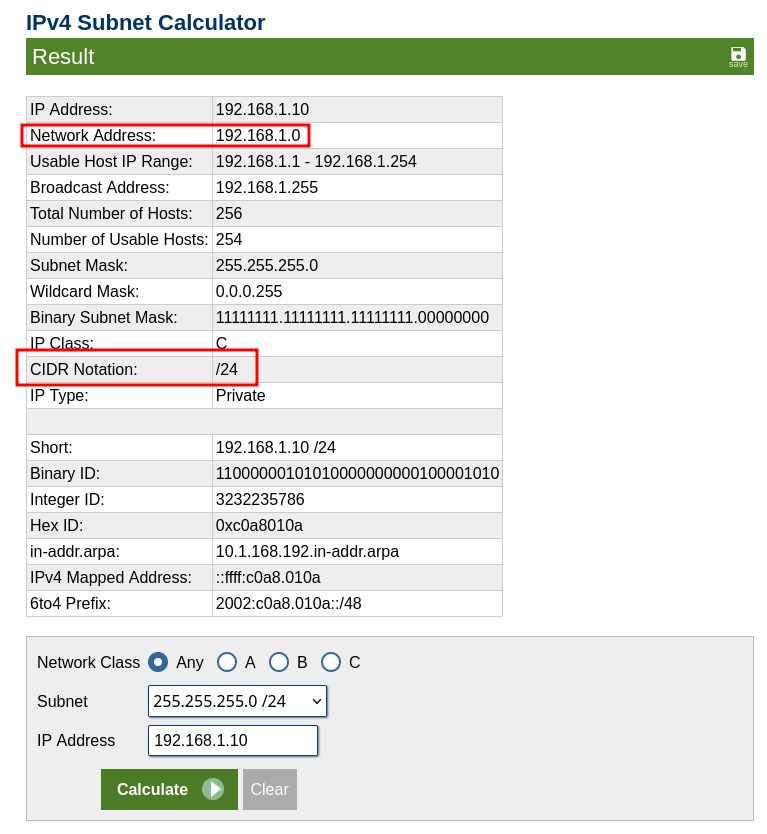
- This will give you:
-
All that remains is to fill in the field correctly in our example
192.168.1.0/24. -
When you click
Connect, you will receive a notification at the bottom as follows: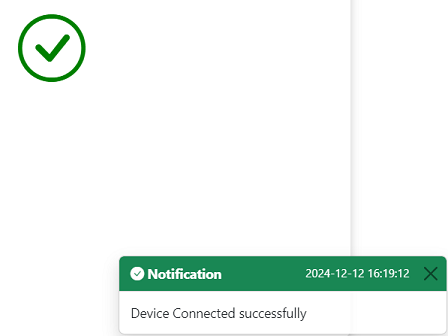
Congratulations, your tunnel has been successfully created.
Tip
- To check, we can ping the address "192.168.1.10".
- Please note that the “Remote EXTENDED” solution is only for one user at a time (for now). It is therefore not possible to open a “Remote EXTENDED” bridge on the same device for two different users.