Opening an SSH tunnel through Remote
Prerequisites
- On Linux: Have an SSH client such as OpenSSH or PuTTY
- On Windows: Have PuTTY installed
Steps
1. Create the session
Create a session on the SSH service for the desired duration:
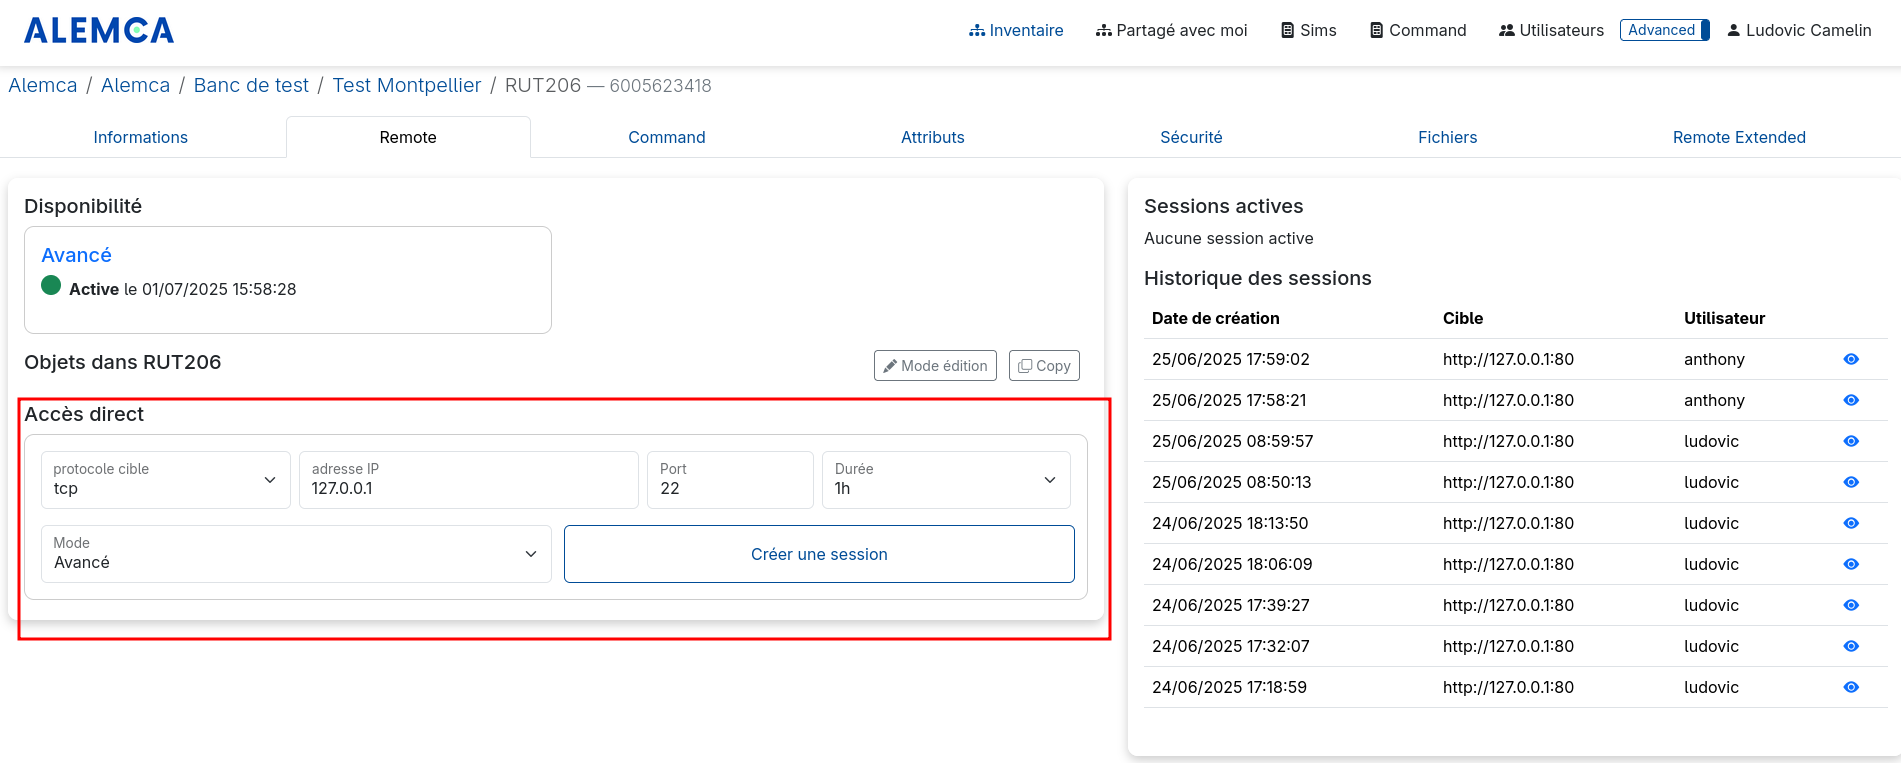
This will add a session with the necessary information. (This can also be done from the objects)
2.1 Linux connection
Connecting under Linux is fairly simple if you use the OpenSSH client.
In the case of our Teltonika gateway:
We use the ssh command, but let's explain the following template:
We use root because it is the account required to ssh on a Teltonika and it has the password for the admin account on the web page.
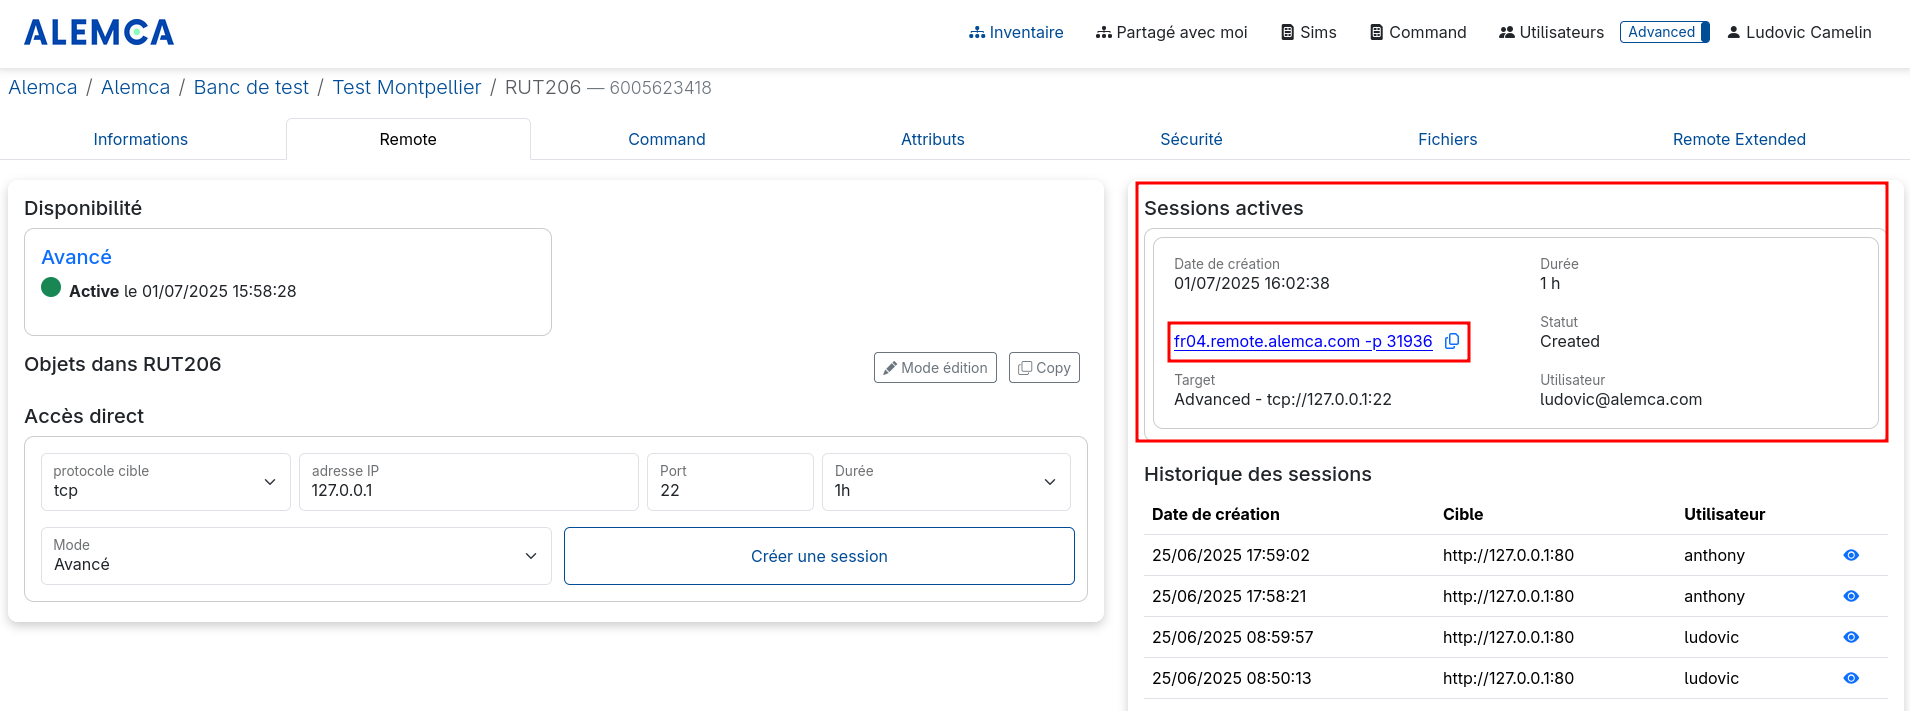
You will find information provided by the ALEMCA web app :

    - Such as fr04.remote.alemca.com as the remote host
    - or <Port_Session>, which in the example above would be 31936

For the part that creates the tunnel :

    - “-L” is an option used to establish a tcp tunnel. Please read the SSH “man” page for more information.
    - <Local_Port> is the port you want to use on your machine at the address “127.0.0.1”. I recommend using the same port as the remote port.
    - <Remote_IP> is the IP address of the machine you want to connect to.
    - <Remote_Port> is the port of the service you want to use. For example, RDP is port 3389.
    - The “:” is the separator used to identify each field.
So if we want to connect to port 443 on machine 192.168.1.6, we would have:
ssh -L 443: 192.168.1.6:443 root@fr04.remote.alemca.com -p 31936
The tunnel is now functional (after connecting via ssh) and is accessible at 127.0.0.1:<Local_Port>
Warning
Please note that this imposes some constraints:
- The machine must be reachable by the Teltonika gateway
- The Local port must be available on your machine (this will generally be the case except for RDP in Windows, because you already have an RDP running, so you will need another local port)
2.2 Connexion Windows
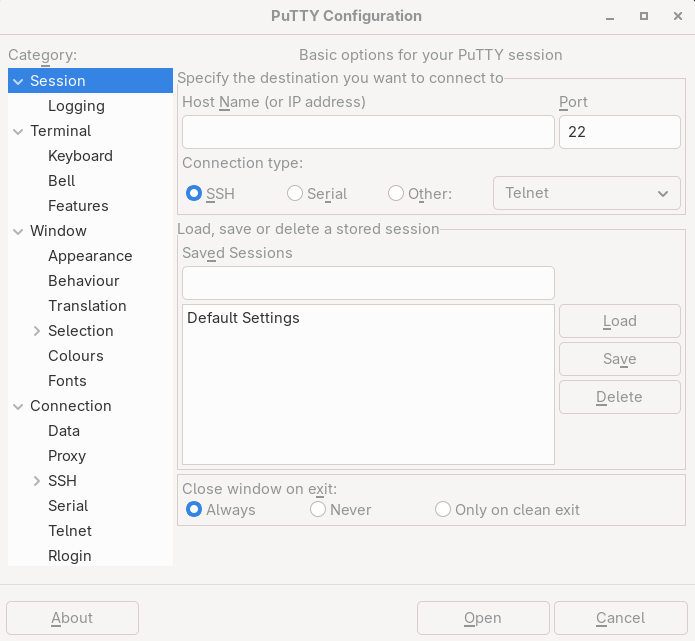
For Windows, I recommend using PuTTY
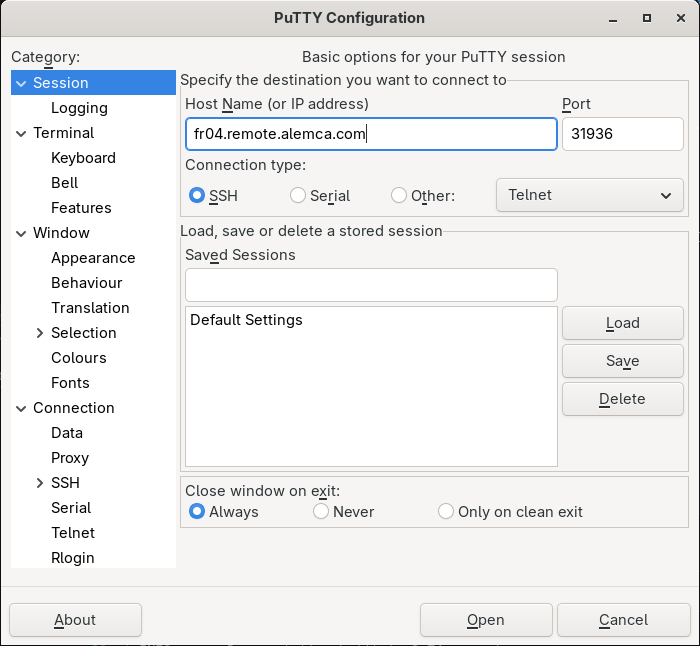
Here is the interface when you open it (slightly different between Windows and Linux) :
| Linux | Windows |
|---|---|
 |
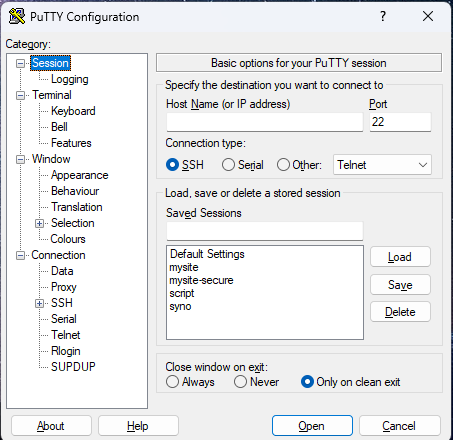 |
In “session,” you can configure the remote server and port in our example (of course, leave SSH in “Connection type”) :
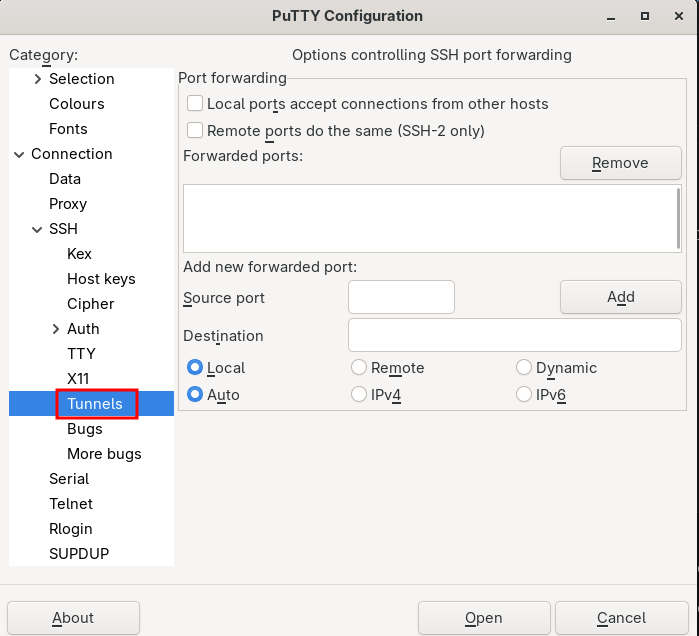
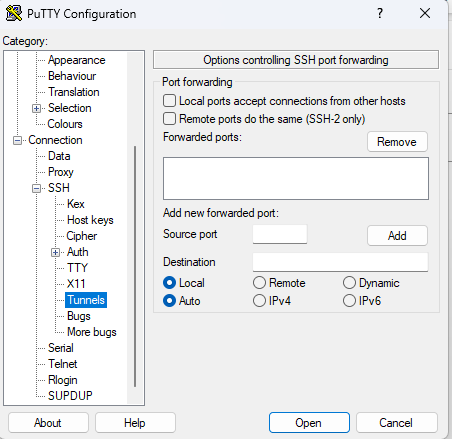
For the tunnel, go to “Connection” then “SSH” :

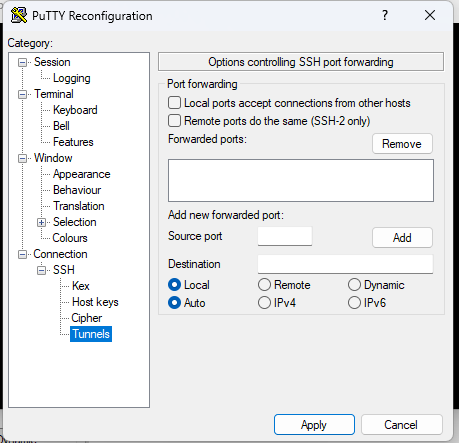
Finally, go to “Tunnels” in the ssh menu shown above :
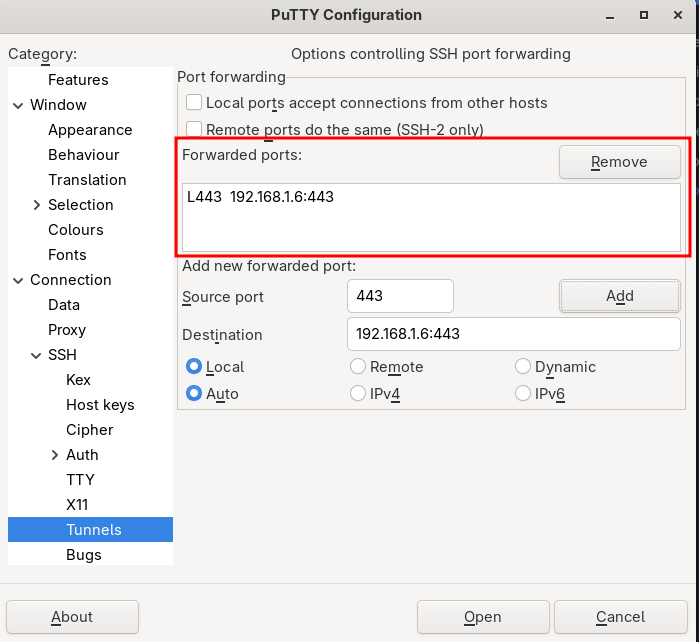
If we return to our example of 192.168.1.6 port 443 to be made available locally on port 443
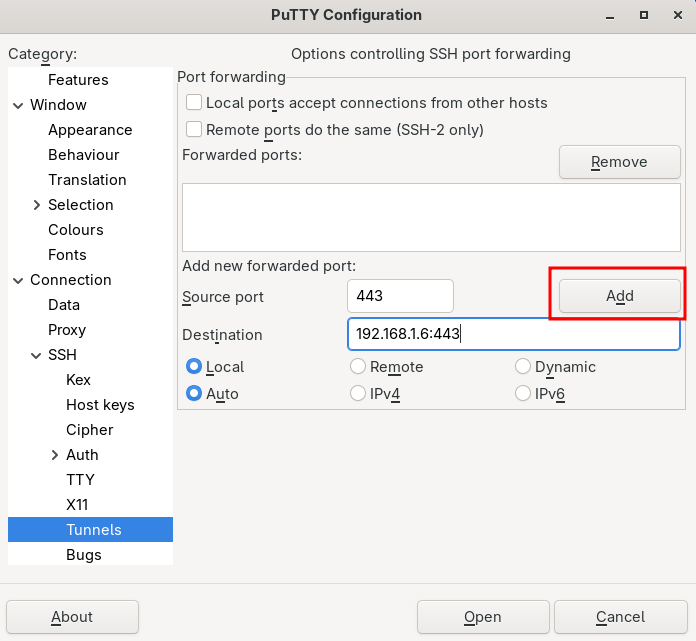 To confirm, click “Add”
Here is the same window in Windows :
Once confirmed, we will see :
Now that this is configured, we can click “Open” to launch the connection. Only once connected will the configured tunnel work.
Warning
Please note that this imposes some constraints :
- The machine must be reachable by the Teltonika gateway
- The Local port must be available on your machine (this will generally be the case except for RDP in Windows, because you already have an RDP running, so you will need another local port)
Tip
- For Windows, it is possible to change the current SSH tunnel configuration without having to reconnect :
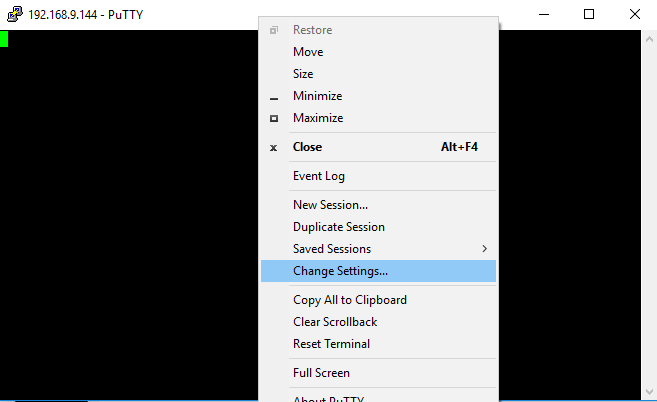
- This will take you to the menu explained above, where you can now add or modify your tunnel. (Remember to go back to “Connection” then ‘SSH’ and finally “Tunnels”)