Remote
The Remote tab is a section that you will see when selecting an entity in the Inventories section. In this section, you can view the device's remote availability, objects linked to the device, as well as areas facilitating access to the linked objects or the device itself. Additionally, there will be another area listing active sessions that you have configured to connect to your device or objects.
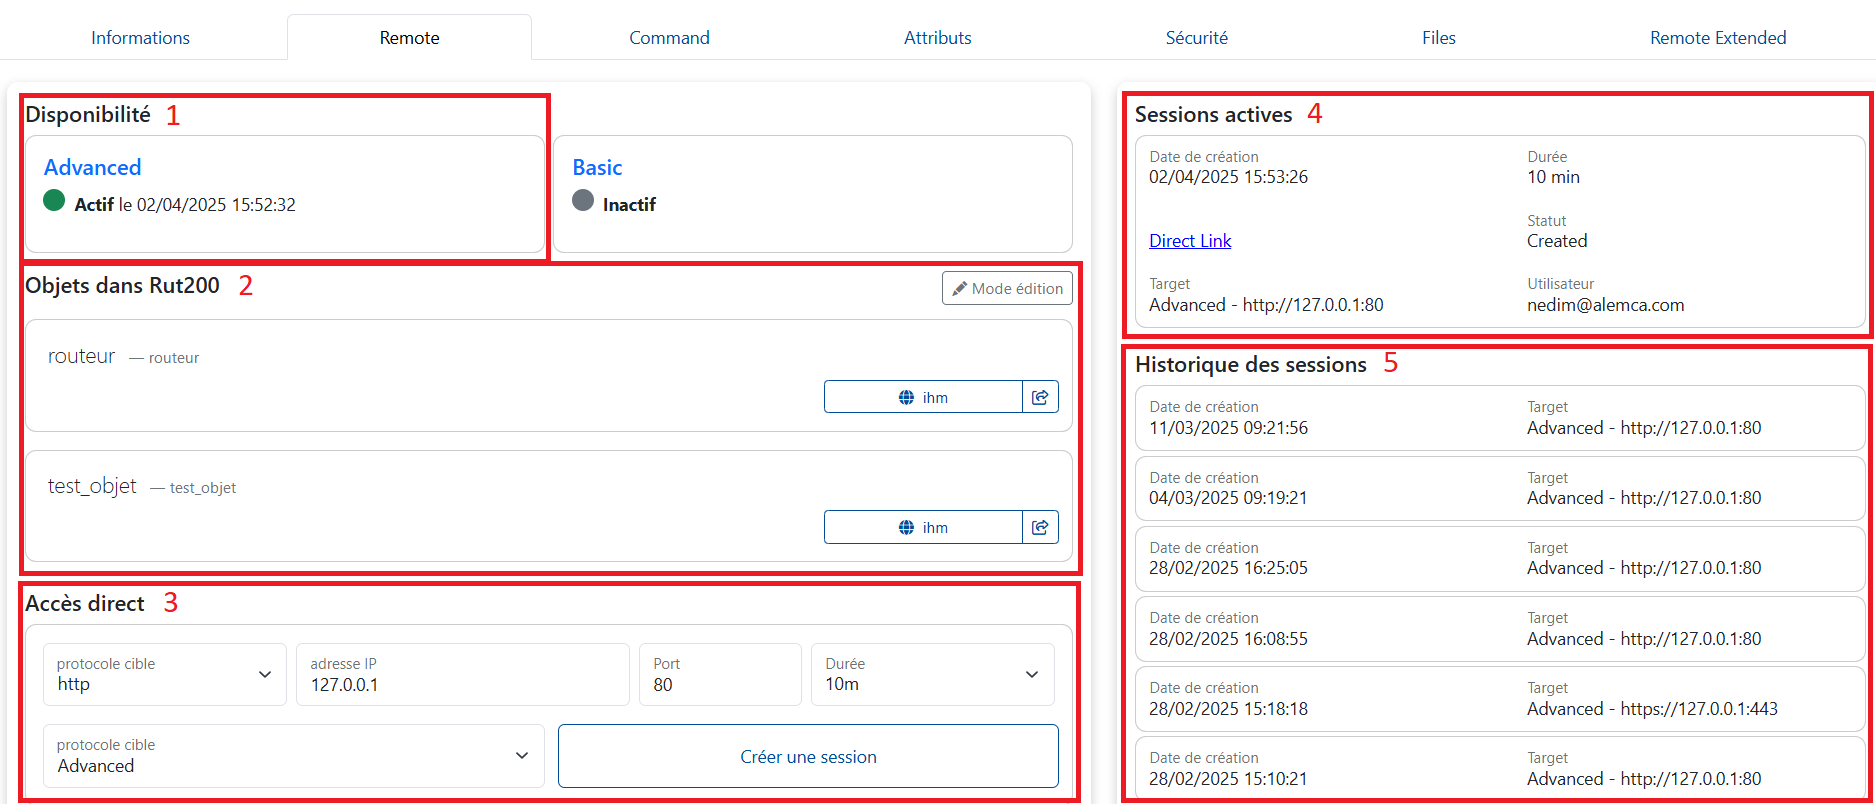
1. Availability
This section indicates whether the device is active or not. When the device is inactive, you will see a gray icon, and when it is active, this icon turns green, displaying the last established communication time and date.
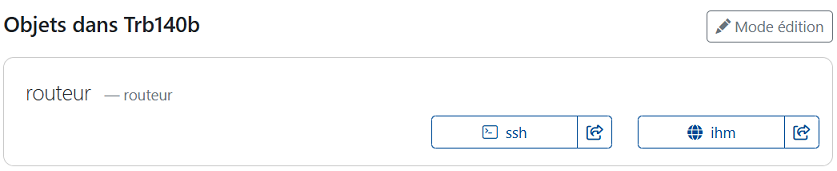
2. Objects
 In this section, you can add
 objects, services, and short links. With the objects you add here, along with the integrated services, you are also preconfiguring the session creation process in the Direct Access section. This allows you to access your most frequently used services with a single click.
Additionally, using the second button located just to the right of the main button, you can also generate a short link for the service.
Now, let’s see how it works.
Attention
If you do not see the Edit Mode button in the Objects section, ensure that the top-right button displays Advanced. If Basic is shown, click it to switch to Advanced, and you will start seeing the Edit Mode button.
Step 1 - Start by clicking the Edit Mode button.

Step 2 - Give your object a name, then click the "+" icon to create it.

Step 3 - Editing Mode
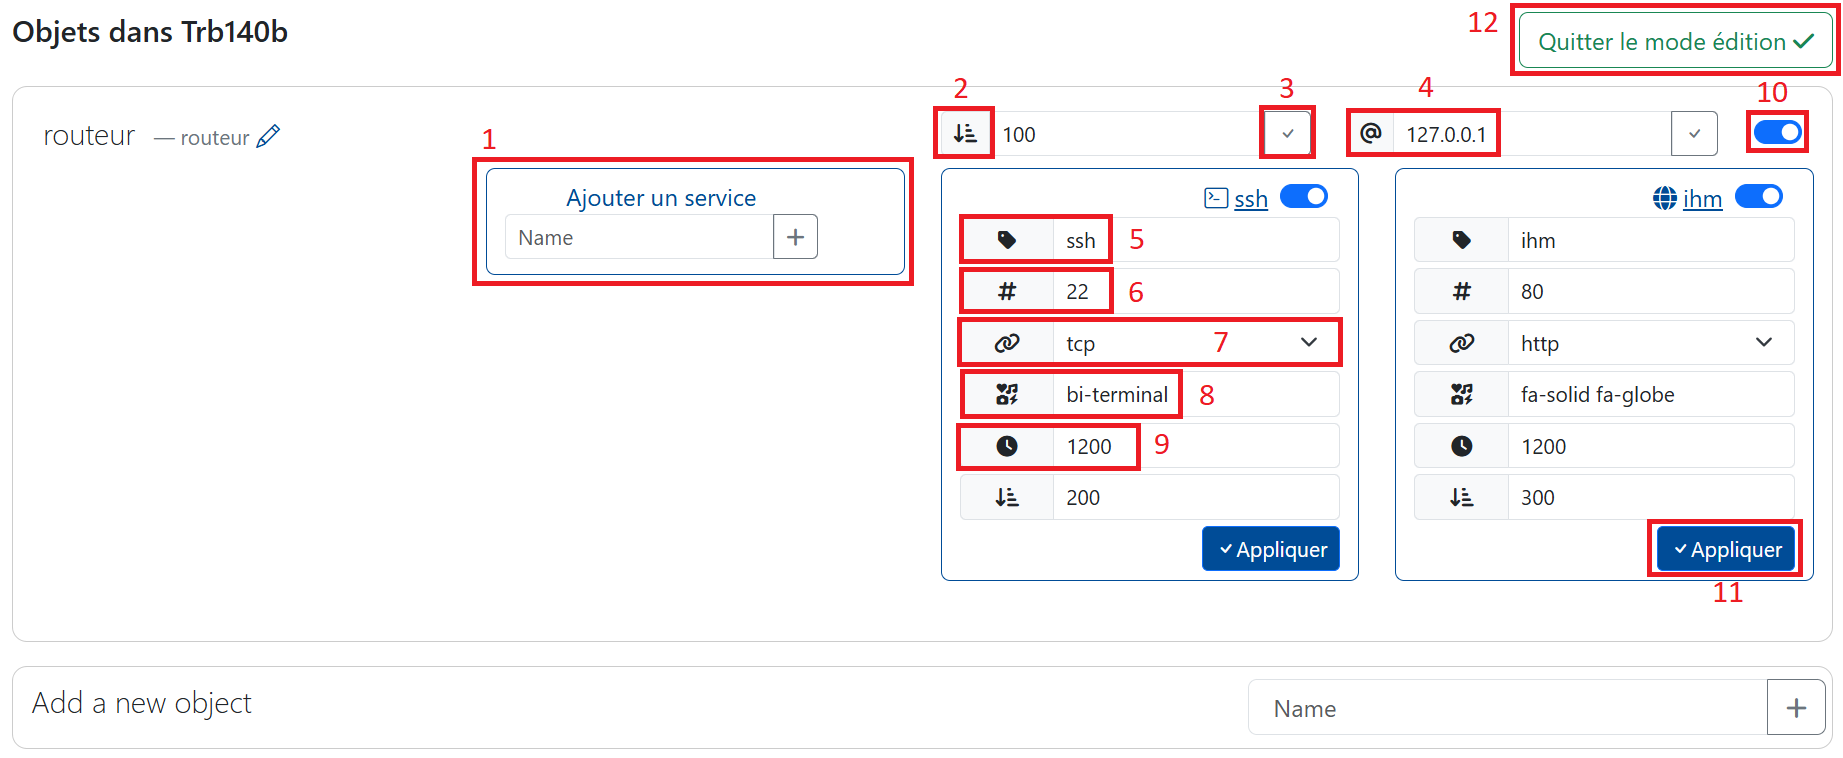
- Just like when creating an object, give your service a name and add it.
- Sections displaying this icon allow you to set the display priority among objects or services added to an object. The higher the value, the higher the priority in display.
- The check button: Changes in the input field will not be saved unless you click this button.
- IP address.
- Your service name.
- The port (for more).
- The targeted protocol (for more).
- The class names of icons you can associate with your services. For example, visit this link, copy the class name of your chosen icon (e.g.,
fa-solid fa-globe), and paste it into this input field. - The duration of the session to be established, expressed in seconds.
- This button allows you to make your objects and services visible or invisible.
- Click this button to validate your changes.
- The button to exit
Edit Mode. Before clicking it, remember to save your changes and make your elements visible.
Step 4 - Usage

When you create an object and add services, the display will look like the one above.
- A button allowing direct access to an object (creating direct access).
- A short link (Short Link) will be generated for this access.
Short Link
Short links are designed to create access links that you can share with a third party to establish connections with devices.
After clicking the Shortlink button, you must configure three settings before creating your shortlink:
-
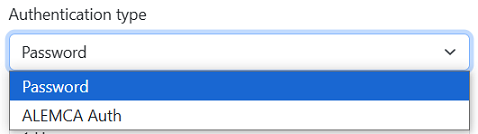
Authentication type: Two options are available. If a password is selected, a password will be provided along with the link. Note that this password cannot be regenerated. If the person you are sharing access with already has Alemca access, the Alemca auth option can be selected.
-
Link validity duration: You can select a duration ranging from 1 hour to 1 year.
-
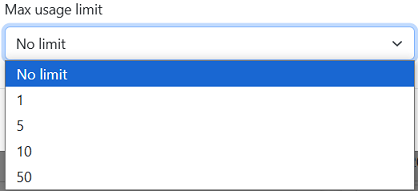
Number of link uses: You can choose from 1, 5, 10, 50, or unlimited.

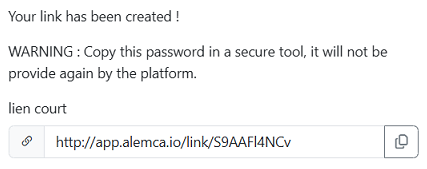
Once the settings are configured and after clicking Create Shortlink, a link will be provided along with a password if the password option was selected. Please copy this information and keep the password safe, as it cannot be regenerated.
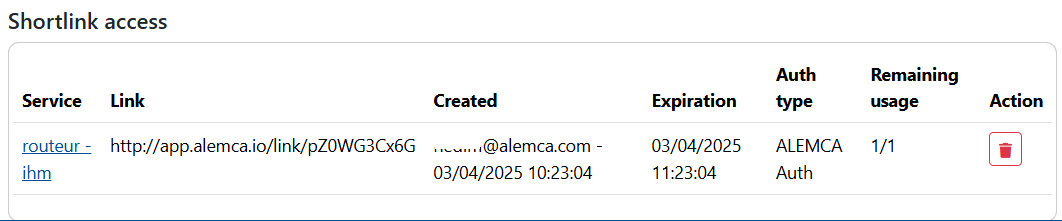
The shortlink you created will appear in the Shortlink Access card, just below the Direct Access card. Additionally, you can access your shortlink from the Shortlink Access card in the Security tab.
3. Direct Access
Attention
If you do not see the Direct Access section, ensure that the top-right button displays Advanced. If Basic is shown, click it to switch to Advanced, and you will start seeing the missing sections.
This section contains the necessary settings to establish direct access.
By default, the target protocol is HTTP, the IP address is 127.0.0.1 (loopback), the port is 80, and the session duration is set to 10 minutes. You can create direct access by clicking the Create Session button.
Target Protocols
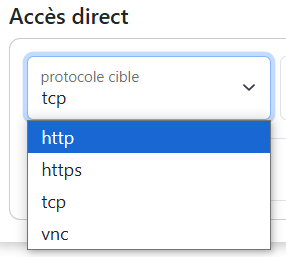
HTTP (HyperText Transfer Protocol):
HTTP is used for data transmission between web browsers and servers. The data is not encrypted, which may pose security risks.
HTTPS (HyperText Transfer Protocol Secure):
HTTPS is the secure version of HTTP, where data is encrypted to ensure communication confidentiality and integrity.
TCP (Transmission Control Protocol):
TCP is a network communication protocol that ensures reliable and ordered data transmission by establishing a connection between devices before transmitting information.
VNC (Virtual Network Computing):
VNC is a protocol that allows remote viewing and control of a computer screen from another device over a network.
IP Address
In this section, you can enter the address of objects connected to your device or directly use the address 127.0.0.1 (loopback) to communicate with the device itself.
Port
The following ports are conventionally used:
- 80 for HTTP
- 443 for HTTPS
- 22 for TCP (SSH connections)
- 5900/5901 for VNC
Duration
You can choose from predefined options: 10 minutes, 1 hour, and 4 hours. During this period, your session will remain active. Once the time expires, the session will automatically close.
4. Active Sessions
This section lists active links provided when creating a session. Depending on the session type, direct links or copyable links are provided. Additionally, it informs you about the identity of the person who created the session and how long it will remain active.
5. Session History
Attention
If you do not see the Session History section, ensure that the top-right button displays Advanced. If Basic is shown, click it to switch to Advanced, and you will start seeing the missing sections.
This section lists previously established sessions that are no longer active. Each card contains information about the established session. By clicking on the cards, you can obtain more details about the session.